Showing posts with label crafting. Show all posts

Friday, October 5, 2012

Wait, it's October?

Life has certainly been busy recently. Moving, campaigning, crafting, unpacking, travelling. It's left me with little motivation to add to this little blog, but here we go.

We have two dear friends who are adopting from Uganda (read all about it here), and I wanted to make quilts for the two additions to their family before they left. Two quilts. At the same time. I really adore a baby quilt pattern that I have used in the past (the small quilt at the end of the post), but it just wasn't going to work for this project. I wanted to incorporate fabric from the previous two quilts that I made for their homegrown children into the two quilts for their heart grown children, but unfortunately, the fabric pieces I had left just weren't big enough for my go to pattern (one that I have made 4 times now... I really love that pattern!).

So, what do I do? I go and find some inspiration.

The first nudging of an idea came when I was watching a new PBS special on the Quilts of Valor program (which is something I would love to do at some point). Eleanor Burns (of Quilt in a Day fame) was featured on the program doing a Tossed Nine Patch pattern. She made it look so simple. So very, very simple. So, I thought that these two baby quilts would be the perfect way to test this pattern out. Small, quick, easy. Simple, right?

In theory.

So, the basic pattern of a tossed nine patch is pretty straight forward:
1. Sew a nine patch block (9 equal sized squares sewn in three rows of three)
2. Cut the nine patch block into four equal squares.
3. Toss all the new squares and reassemble them into a beautiful quilt that looks much more difficult to sew.

Simple, right? (I even found a YouTube video of how "simple" Eleanor makes it out to be).

Well, the problem is that I have a really hard time matching fabric. Well, really, matching anything. It was fun to go shopping in my stash for all the fabrics, reliving memories, thinking about the different projects that I had sewn. I found fabrics that I felt coordinated with the two from the original quilts and complimented each other without actually making the same quilt for both children.

I decided to make 4 inch squares to sew into the nine patch pattern and make 12 nine patch blocks. Using a standard 1/4 inch sew allowance, this would give me a finished quilt of about 31" x 42" which, I've been told, is a pretty ideal size for a child's blanket. So I cut lots of fabric and figured out which fabrics went with what. And tried to balance the use of flannel and cotton in the two quilts.

But then I over thought the process. Or maybe under thought? Either way, step three for quilt one took waaaaaay longer than I expected.

I think in the end, though, the quilts turned out quite nicely.

This was the first quilt that I did. For this one, I did not take Eleanor's advice to use the same fabric for the center square of each nine patch. I had some convoluted way of arranging the fabrics in the nine patches and working through some sort of pattern that made sense in my head but was extremely chaotic after the whole jumbling process. The arranging of this quilt to make sure that the colors were well distributed and none of the same fabrics were touching took me two days. Really. Ask Jeff.


And here's the second quilt. For this one, I did use the same fabric for each of the nine patch blocks and arranged the other eight fabrics in a much more intuitive way (I figured out which ones looked nice next to each other, and then just rotated the eight fabrics around the center block for each of the 12 nine patch blocks). This made the post-jumble layout of the quilt MUCH easier.

Jeff picked out which backing went with which quilt since I forgot what I was thinking in between buying the fabric and actually attaching it to the fronts.

And blanket binding. How I hate thee! But, in my opinion, no baby blanket is complete without that satiny finish along the edges, so it is always worth the bother. No matter how many times I do attach this blanket binding, I always forget what I did the last time. My favorite tutorials are here and here. The key is getting your zig zag stitch just right to minimize bunching.

I am not a quilter that actually quilts her quilts, so these are just tied with coordinating floss. The batting is 100% cotton which is the perfect weight for Florida.

I was so worried that the quilts would be too busy and crazy, but when I delivered them to their new home, they seemed to fit right in. The coolest thing, too, was that I had no hint on nursery theme for these puppies, so I started with the animal fabrics (thanks, Mom. Those are from your stash!), the two fabrics from the other quilts (which are the green palm tree and the light yellow polka dot), and went from there. Turns out the two babies will be welcomed with a circus theme! And blanket number one has a fabric that coordinates almost perfectly with the crib bumper for the bed. God was certainly in the sewing room with me on these ones to make sure they turned out just right for this very special project.

The tossed nine patch really was a fun pattern, but I'm not sure if I would do it again. Or if I did, I would probably have the nine patches in all one color family. The next quilt will be back to my favorite again :-)

(p.s. Thanks for the photos, Karissa, since I completely forgot to take some in the rush of finishing the quilts on time. You can see them featured in her virtual baby shower here)

Saturday, June 9, 2012

Quilts big and small

I promised that I would soon post a post (redundant?) about a large project on which I was working, and because I waited long enough, you'll get a two for one deal. If you stay until the end, you may even get a bonus project.

Quilt number one (drum roll please....)


My SIL commissioned me to make this quilt for her niece that will be attending FSU this Fall (Congrats, Brianna!!). This was the very first full size quilt that I have ever completed... or really attempted for that matter, so I was a little intimidated. I didn't really have many guidelines for the quilt, just make it FSU and preferably a twin size rather than a lap blanket. The finished product is about 90" x 60" (its shown on our queen size bed and reached the edges).

I didn't really take pictures as I made it since, quite frankly, I was flying by the seat of my pants on design. To start, I based my design a bit off of Nancy Zieman's "fat free triangle" method. It made the sewing part go super fast, but I still hate all the cutting. I had to go back to the fabric store a few times since I miscalculated material amount (hey, I'm an English major, not a math major). I also didn't realize how difficult it would be to find coordinating fabrics to match the FSU licensed stuff. The yellow (or gold or whatever the "official" color is called) is really a bizarre color, so I found it was actually easier to find material that matched the crimson color (which I thought would be really difficult to match). If I were to do something like this again, I would probably make the double blocks of the crimson FSU fabric actual rectangles to save some time.

I did some basic machine quilting which you can see in the first small picture. I chose to go around the diamonds as the simplest design element. This was my first experience machine quilting something this large, and my machine and I exchanged quite a few words. I definitely recognize the benefit of having a long arm machine, now. In addition to the machine "stitching in the ditch," I also tied with crimson and gold floss around the solid squares. The one thing I discovered with this is make sure you have a needle with a large enough eye so that you're not killing your fingers trying to pull the floss through all of the layers.

For the binding, I cheated a little and used a self-binding technique. I researched many different sites on the internet to find some help with this, but I liked the binding help on Annie's Attic and Ludlow Quilt and Sew the best. There was also a series of videos on YouTube by the Missouri Star Quilt Company that was great, too (be careful, though. I got lost for quite some time watching all of their fantastic tutorials). I also machine sewed the binding rather than hand slip-stitch since I was on a bit of a time crunch. I think that it turned out quite nice.

The other tip that I found while layering this quilt was that you need a large space (thank you living room floor). A hard floor is nice. In order to make the backing nice and tight, you really need to tape the backing fabric to the floor (if you have carpet, you can also pin it into the carpet). I never knew that, but I'll admit that it took me a few frustrating hours before I caved and looked up why my backing fabric wouldn't stay smooth during my layering process. Let my frustration be your learning experience. And if you're curious, I used a 100% cotton batting that isn't as fluffy as polyester batting but is just perfect for Florida.

Also, since I didn't use all those scraps left over from the fat-free triangle method, I do have more FSU fabric for anyone interested :-) It's probably not enough to make another full size quilt, but we could work out something.

Quilt number 2 is much smaller and in a pattern that I have done several times before:


It's a crib size quilt I made for a friend who will soon be blessed with a little boy. As you may have guessed, the theme is dinosaurs (ROAR!). The fabrics are a mix of 100% cotton, cotton flannel, and fuzzy-material-that-should-not-be-manufactured-because-it-is-a-nightmare-to-use-and-makes-a-huge-mess (although I think the official name is warm & cuddly). I declared that the little pieces of green fabric it left behind should be dubbed fabric poo. I love using the satin binding on these baby quilts because I feel that every baby needs a little oy-oy (as my brother used to say) in their lives. I just wish that I would remember how I attach it so that I don't have to rethink the process everytime I make this pattern. For this quilt, I did a little hand quilting around all the fuzzy fabric. I found that it was so much thicker than the cotton, that it just needed a little something to help ground the whole thing together.

And the bonus project is fancy burp clothes for the same baby. What baby doesn't need some camo in his life?

Wednesday, May 2, 2012

Crafting is good for the soul

We'll just ignore that once again I have seriously neglected this blog. I'll say that life has been consumed by many things. I'm running for an office on the international board of SLA, serving my regional SLA chapter as president,  planning some trips to conferences, and crafting away. I've been working on a really large project that I'll be able to share soon (but not yet) and some smaller projects in between.

Last weekend, I facilitated a Bible study for my church's women's retreat. We evaluated our thought closets, considering how it is that we as women talk to ourselves, what takes up the most space in our thoughts, and how God would actually like us to talk to ourselves and prioritize our thoughts. I had my doubts about the format (we watched several videos in the Jennifer Rothschild study Me, Myself, and Lies: A Thought Closet Makeover) since we were trying to cram the lessons of a 6 week study into a weekend, but I think it went well. Our church is planning on doing the rest of the study this summer, and I really can't wait.

So, what does this have to do with crafting? Crafty woman that I am, I couldn't miss out on an opportunity to make a little something for the ladies that attended the event. A few months ago, I saw a blog post about making journal jars, and I stuck it on the back burner of my mind. When I started studying for this event, I realized that this was the perfect opportunity.


Step one: gather jars of all shapes and sizes. Why buy jars when we empty jars all the time? The size of the jars ranged from a small jam jar up to a spaghetti sauce jar. It really made no difference, but I think I liked the odd shaped jelly jars the best. Make sure the lids fit snugly on the jars. I found metal worked better than plastic in terms of holding the paint. I did use one canning jar, and I just glued the two pieces of the lid together with tacky glue.

Step two: make sure the jars and lids are nice and clean, clear of all labels and glue, and don't smell funny (like one pickle jar I wanted to use). A nice long soak in warm soapy water worked well for most, but you may need to pull out the Goo-gone on the tougher labels.

Step three: I painted the jar lids to make them look less like discarded food jars and more like a crafty item. I painted both the outside and inside of the lids to give them a more finished look. This was the part that took the longest since you need to let the paint dry completely between coats. The outside of the lids took about three coats, depending on the lid material (plastic, metal, shiny metal). The insides only took about two (mostly because I was lazy).


Step four: jazz them up! I found a super cute dress form graphic over at the Graphics Fairy, my go-to site for license free graphics. Book mark it. Now. After some consultation with my DH, we agreed that I should color them to match the lids. I think that it added a very nice touch. I used my Crayola True to Life crayons that have complimenting colors mixed into one crayon (they are my most favorite crayons which is why it is so sad they were discontinued). For the inside of the lid, I made a little reminder of the Bible verse that was the focus of our study.

Step five: I attached the graphics to the lids using Mod Podge which is always super fun to use. It took about two coats to cover the graphics and make it smooth enough. I am also hoping that this step will help protect the paint from chipping. Let the lids dry completely before placing them back onto the jars (the point is to be able to reopen them after all).

Step six: fill the jars with journal prompts. I used a bunch of thoughts from our study and then when I gave the jars to the ladies, I encouraged them to continue filling them with favorite Bible verses and other prompts that will remind them of God's will for their lives. I colored the back of the paper to match the lids and dress forms.

If you had a journal jar, what would you put in it?

Thursday, September 1, 2011

Back to Crafty

Let's just call the last month and a half of silence a Summer break and get this thing rolling again.

Life has been keeping me busy with future planning at work, future planning with the Florida & Caribbean Chapter of SLA, and a little future planning at home. Unfortunately, all that future planning didn't leave me much time or desire to reflect on what's happening in the here and now. I'd just like to take a moment and update what few faithful readers I may have left on my current crafting project.

Back in 2003, my mom thought it would be a great idea to make matching Christmas pj's for me, my sister, and her. Aren't we cute?

For the next few years, she continued this tradition, expanding her repertoire to include my nieces, sister-in-law, brother, dad, and husband. After a few years, it was just too many pajamas. A while back, I started thinking about all that flannel going to waste in her drawer. Florida climate being what it is, there isn't much call for long sleeve flannel nightgowns even in the dead of winter. She was glad to make room in her drawers and gave me her nightgowns to turn into a quilt.

You probably thought I was going to post a picture of the completed quilt next. Fooled you!

I finally have all the squares cut from the three nightgowns. Can I also just say at this point that I detest cutting fabric. I'll even go one step further and say I loathe cutting fabric. I am convinced I am not an avid quilter simply because of the amount of fabric that one must cut before sewing begins. So. There you have it. I also have additional fabric from another year that I didn't even bother cutting plus a pair of pj pants that Jeff no longer wears, but with over 300 squares, I think I'm good for now. I didn't really think about making a tutorial for this until I was just about done with all my cutting, so bear with me a bit.

The first step was deconstructing the nightgowns to get the most use of the material without loosing my mind. I decided to just cut off the seams rather than rip them out. I started by cutting up the sides, cutting off the sleeves, and cutting the shoulder seams. I didn't bother trimming off the hem of the sleeves or shoulders, but I did cut off the neck line. The finished product looked something like this:
I chose to make 5 inch squares for my quilt mostly because of the the width of the sleeves (just over 15 inches at the narrowest point). I wasn't too concerned with grain and all that since I'm using scrap fabric. Just make a straight cut somewhere, and go from there. There are about a million tutorials online for cutting fabric, but I found this one on Make and Takes pretty useful.

Oh, and since you're using old nightgowns, be sure to iron the fabric really well after you detach all the seams and before you start cutting your blocks.

I started with the sleeves, cut long strips 5 inches wide and then cut the strips into 5 inch blocks. For the body of the nightgown, I folded the fabric in half to create a straight edge before trimming. While folded in half, I cut the material into the 5 inch strips. I layered these strips on top of each other (I only did 2 layers) and then proceeded to make my 5 inch squares. Twice as fast, twice as fun? Maybe. All of the scraps, I set aside to make my 1 inch squares. I followed the same method to do the inch squares, but they are just tinier. Here are my piles of squares:

Each nightgown gave me over 100 5 inch squares, but your results would all depend on the size of the nightgowns and the size of the squares you cut. I have no idea how many 1 inch squares I'll get because I'm still cutting them. Did I mention my feelings toward cutting?

I am now working on sewing together the 1 inch squares into several mini postage stamps quilts so that I can imbed them in the quilt. I am using a denim quilt I made many years ago as a model.

That's me, my sister, and dad a million years ago. You can see that the seams are frayed and fuzzy. I chose this method since flannel is nice and cozy, will fray in a similar way as denim, and you rarely need anything any thicker than a single layer quilt in Florida.

Here is the process I am using for the postage stamp portion of the quilt. I did a little geometry and figured that I would need to make these 8 x 8 squares with a little less than a 1/4 inch seam between each block. That gets the square down to the 5" x 5" size so that I'll be able to sew them easily into the quilt. Here we are in process and with my first completed block:

You can see on the right, the last row I've already sewn the blocks together. I am doing this part of the sewing by hand (I'm pretty good at judging the 1/4 inch seam allowance). Sew the blocks WRONG sides together (I know, it's a bit counter-intuitive) so the seams will be on the top of the quilt. My sewing machine is a bit... persnickity, and I didn't want to deal with the hassle. You can see how much the size of the block shrinks after you sew it. Once all the rows are sewn in this method, I took them upstairs to iron them. Alternate the direction of the seams so the rows will fit nicely together. Sew the rows together wrong sides together with the same size seam on your machine that you used while sewing by hand. The completed block is on the left.

I am taking the time to arrange each block, but as you can see, since only about 1/2 inch square is visible after everything is sewn together, you can pretty much just combine the blocks in any way you wish. I haven't quite figured out if I'm going to make the completed quilt 10 x 10 or 8 x 8. We'll have to see. I was hoping that I could submit it to Joann's Quilt Your Colors Contest since my mom did buy all the fabric at that store. After reading the entry requirements, though, you have to show the receipts of purchase. I doubt that she still has those :-) Besides, this will be more country comfort than work of art.

I'll be sure to post pictures when I'm done. Hopefully before Christmas.

Thursday, June 2, 2011

Trying to save some money

So, I made a mistake. I friended Vera Bradley on Facebook, and I have found a new obsession with the products. The problem is that my part-time librarian salary hardly allows me to purchase any pieces. So I look at the pictures and drool. Well, the other day I was ogling over the wristlet. I thought this would be the perfect accessory for my upcoming travels to the SLA Annual Conference in June. And I think to myself, "Self, you can make this. It's just a quilted bag." Yup, just a quilted bag.

For about a week, I kept looking at the piece and thinking about how I could piece together my own version. I thought and thought and thought, and I finally developed a plan. Today Last Friday, I finally finished (this was my first sewing how-to. It took me much longer to explain than I thought).


Personally, I think it came out pretty good. The finished dimensions are about 6 x 4 x 1 1/2 inches. This was no easy task, though, so I'd like to offer some tips. If you have the money, just buy the Vera Bradley. I can appreciate the prices much more now, although I imagine their factories have a number of ways to make the process much smoother. If you don't have that much money, save some time by buying the pre-quilted fabrics at your local fabric store. I didn't like any of the prints, so not an option for me. And finally, don't try this craft if you are feeling rushed or impatient. You'll be ripping out a lot of sewing.

Here are the materials that I used:

You'll need:
-- Two coordinating fabrics. I started with a yard of each since I liked the fabrics. You would think that I would have gone to my stash (and I did consider it), but no. These fabrics caught my eye on the Red Tag clearance at JoAnn Fabric. The widest piece that you would need is about 15 in., so you can use up some scraps.
-- 1 Zipper (mine was 15 inches but I ended up trimming it a bit)
-- Light quilt batting. You'll only need about a 15 inch square
-- Some sort of clip. DH and I had a terrible time finding these. They ended up being in the jewelery section of the craft store and weren't exactly what we were looking for, but it works.
-- Coordinating thread
-- Disappearing ink/Mark-B-Gone pen or some other temporary marking tool.
-- Scissors
-- Straight pins
-- Seam ripper
-- Sewing machine (I want to give you a complete list :-) )

I started the process by making a 15 x 13 inch rectangle of quilted fabric, although if I were to do this again, I would probably make it a little bigger (15 x 15) because all the sewing shrunk the size a bit. Start with a fabric sandwich: liner fabric (right side down), batting, outside fabric (right side up). Mark lines at a 30 degree angle 3/4 inch apart in a criss-cross pattern on the right side of either fabric. I used a disappearing marker to do my lines. If you do this, make sure to work quickly. By the time I was done sewing, I could barely see the lines any more.
On the left is the marked fabric. On the right is the finished sewing. I was trying to show that I used a contrasting thread on the back. I figured since I was using such a bold liner, I might as well use a bold thread choice, too.


From this quilted fabric, cut two panels (7 1/4 x 5 inches with curved corners... I can post pattern pieces if anyone is interested) and one rectangle gusset (12 3/4 x 2 3/4 inches). I debated how to cut these out. Just be sure that the diamonds on your two panels go the same direction.

In addition to these piece, you'll also need the following:
2 pockets from outside fabric (7 1/4 x 6 1/2 inches with the same curved corners)
2 pockets from inside fabric (4 1/2 inches square)
1 piece for zipper from outside fabric (13 1/4 x 3 inches) cut in half lengthwise (2 pieces 1 1/2 inches wide)
1 piece for zipper from inside fabric (13 1/4 x 3 inches) cut in half lengthwise (2 pieces 1 1/2 inches wide)
1 strip for handle from inside fabric (12 x 1 1/4 inches)
1 piece for ring from inside fabric (1 1/2 inches square... I think... I didn't write that down) You may want two of these if you want to be able to clip the strap on the other side to make this into a purse.

Pockets:
Fold the two large pocket pieces in half, wrong sides together, to make a piece 7 1/4 x 3 1/4 inches and press. Set aside.
Fold the two small pocket pieces in half, right sides together, and sew 1/4 inch seam on two short sides, leaving the bottom open. Clip the corners, and turn the pieces right side out.
Center the two small pockets on each larger piece. Sew the smaller pockets onto the larger pockets as close to the edge as possible. Set aside.


I have to admit, just writing all this is making me tired.


Zipper
 There may be a better way to do this, but I did it this way. Press 1/4 inch along one long edge of all four zipper pieces (2 outside, 2 inside). Using your zipper foot for your machine, sew as close to the edge and zipper as possible. As you can see, the zipper is longer than my pieces. Judge for yourself how you want to line the edges of the pieces. I also folded up the short edge of one edge to form a clean edge. I suppose I could have done this on both ends, but I had already started and was being lazy.


 Strap
For this, I pressed 1/4 inch on the long sides to the wrong side of the fabric. After that I folded the piece in half long side, right side out, and pressed. Stitch along the long edge as close to the opening as possible. Attach the clip to one end. To make the fabric ring holder, sew the 1 1/2 inch square fabric, right sides together with a 1/4 inch seam. Turn right side out and press.


Quilted guesset
This was a tricky one. Since this piece is cut from the quilted piece of fabric, I had to remove some of the quilted stitches with the seam riper. I removed enough to have about 1/2 inch of fabric unsewn. I then cut the 1/2 inch of exposed quilt batting from the piece. Fold and press a 1/4 inch of both fabrics to the inside. Top stitch across so that the edge is finished. On one side, insert the strap and the piece inserting the fabric ring.

Bag construction
Sigh. I hate pinning, but there was just no way around this one. With curved edges and gussets, pinning was a necessity. I also chose to do French Seams again, so yeah. What was I thinking. This part of the project was what made me appreciate understand the VB price tags (they are still expensive).

Place the pocket piece you set aside on the inside of the first purse panel, matching the curved edges (the open bag picture back at the top could help you visualize this). Start by pinning the zipper gusset wrong sides together with the first purse panel. I marked the middle of the purse piece, found the middle of the gusset, and started pinning from there. I chose to open the zipper so the fabric wasn't quite so bulky. If you need to trim your zipper, now is the time. I trimmed mine and sewed over to create a new zipper stop.

Repeat the process with the quilted gusset, making sure to pin through the purse panel and the pocket. Try to make sure that the edges of the gussets are parallel to each other so your purse isn't crooked. The quilted gusset will overlap the zipper. Sew all the way around with a 1/4 inch seam. After sewing around, trim close to the seam without cutting the stitches.

Start the process again, matching right sides together now to make the pretty French Seam. Pin carefully and sew 1/4 inch seam.

Repeating this process to attach the other side of the purse can be a little complicated since the gussets won't be as flexible. In fact, I have another sewing project on my sewing cabinet that is stopped at this very point. Make sure you do zip the zipper, though, so that the zipper will match once sewn. Leave the zipper open just a little for turning. Start by matching wrong sides together (I got myself confused and had pinned the whole thing when I realized I did it wrong and had to unpin and repin the whole thing. Grr.), sew, trim, pin right sides together, sew, and TADA!


Tips on sewing. The corners will be tricky. Be careful not to have the material be too bunchy. I bunched a little too much on one side, and the gusset turned out a little crooked at the end. Did I rip it out and start over? No way. This is a homemade project. Perfection is not necessary.

I have a bit of the quilted fabric left over and have been thinking about things to do with it. I think maybe I'll make a coin purse, but I was also considering a key fob. Can't waste a good scrap of fabric, especially one that took me so long to create.


So, any brave souls out there that will try this?

Thursday, May 5, 2011

Time to put the crafty in the catalog

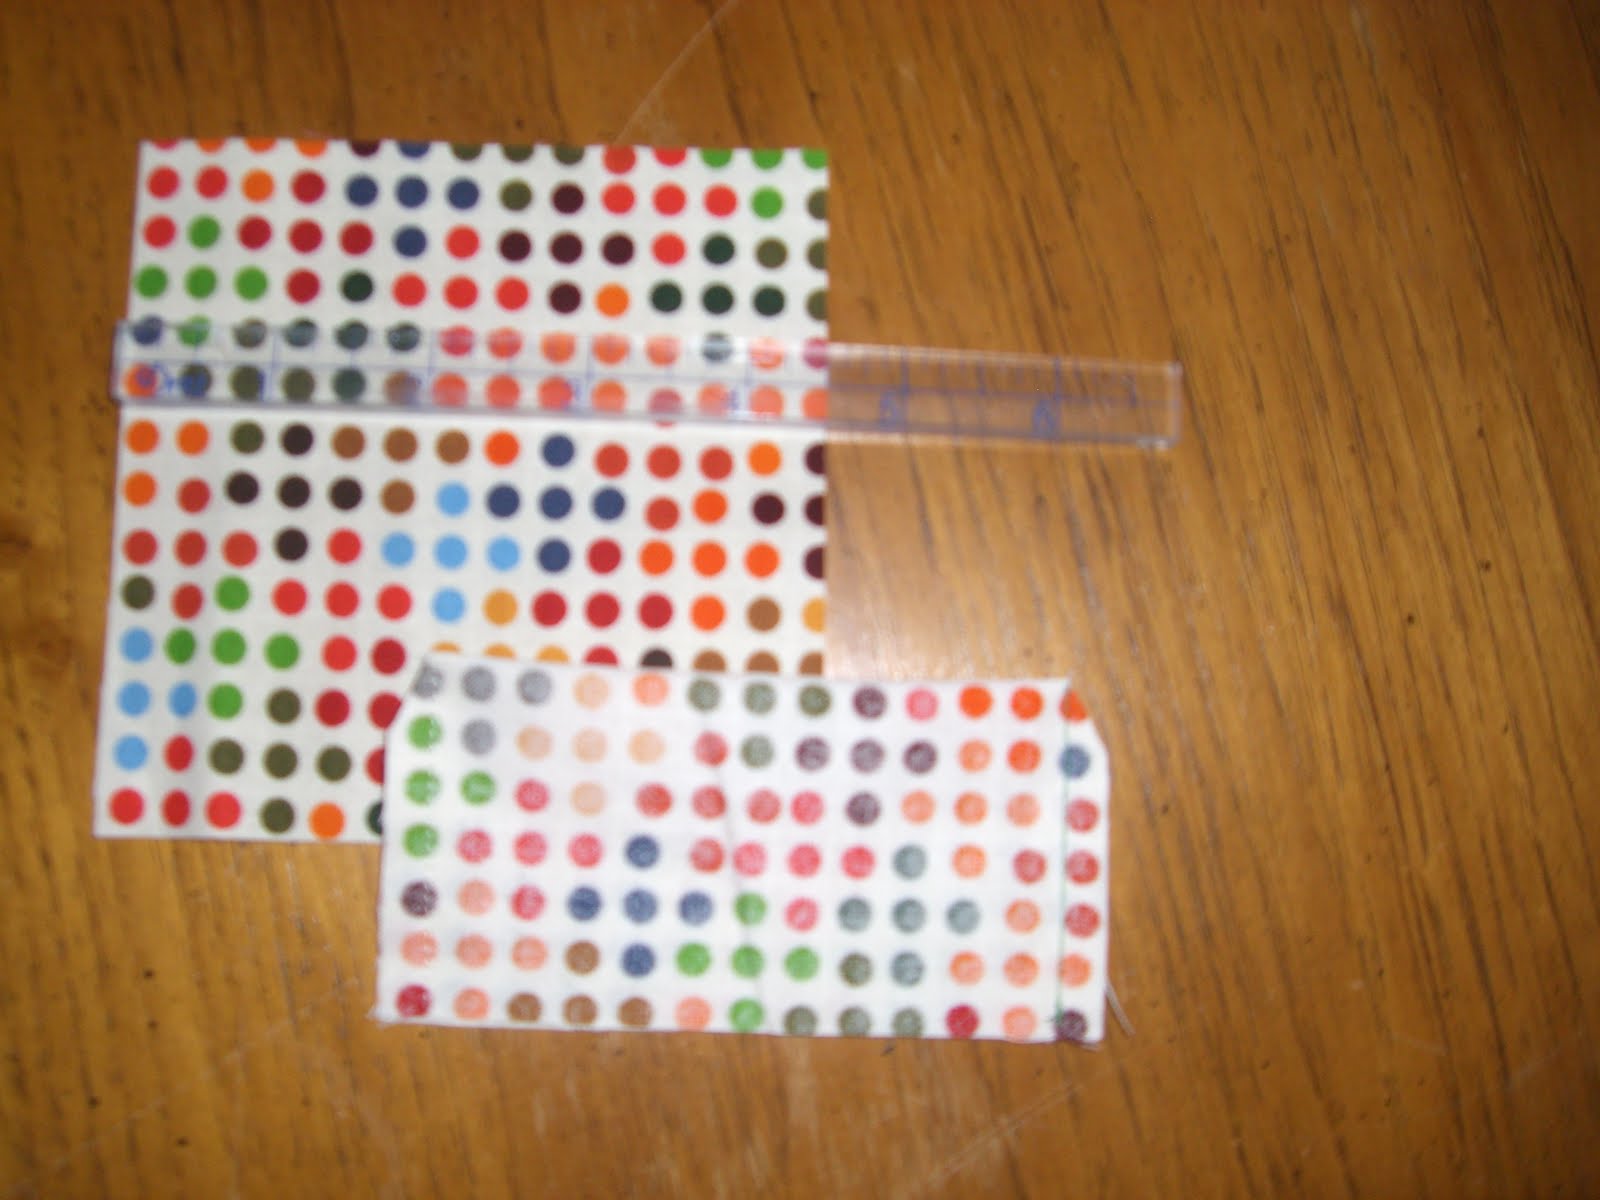
Well, I think it's about time that I actually post on something crafty since I've billed myself as such. Background: my mom and I recently attended the Original Sewing & Quilt Expo in Lakeland, FL (which btw, will be happening next Feb. 23-25). I attended the Expo in Tampa couple years ago and was super excited that I would be able to go this year. One of the funnest parts of the expo are the various Make and Take crafts that they have sponsored by various booths. My mom humored me as I eagerly picked three projects:

Disclaimer: For this particular post, I'm not going to go into much detail on the patterns since these were not my own design. I will say they are all super easy, and those that are really crafty can probably figure them out.

Project number one (actually purchased the kit at the Expo and just finally finished it this morning): Reusable snack pack and sandwich sack.
First let me start by saying that I have wanted to make these for many months. I saw them posted on a blog a while ago and tried, without success, to find the fabric needed (granted, I didn't try very hard). I was happy to see that this was one of the Make & Takes at the Expo.

The lining of these two items is PUL fabric, also used many times in lining for cloth diapers. The outside is a laminate fabric as well, but could be simple cotton. The bag is made out of two simple rectangles folded in half. Use French Seams on the sides so that crumbs won't get stuck in the fabric (how gross would that be?). The sandwich keeper has the same lining as the bag. As you sew around the edges (fabrics right sides together) just be sure to leave an opening for turning. The Velcro on both items was sewn on before doing any seams. I can't wait to try them out!

The second project is a fabric cover for those little mini-packs of tissues. I always thought these things were super complicated. Turns out, they are super simple. The key is to cut the lining (the pink fabric) slightly longer than the outside fabric. Doing that gives you the nice little border that looks like bias tape. Use French Seams on the inside of this one as well to give it a nice finished look.

The last kit that I did is a little zippered bag. The clever thing about this one, is that the zipper is only half of a zipper (bizarre to grasp, but true). If I make any more of these (which I will, since I bought a ton of zippers), I'll use whole zippers. It will just require one more seam that way. The assembly of this particular one starts with one half of the zipper, no pull attached. Sew the zipper half to the top, sew the bottom seam, than attach the pull to the zipper (which the lady at the expo did with her teeth... a little gross). Sew the last side seam and voila! A cute little bag for all those little things in our lives.

I love little crafts like this because they make great gifts. What crafty things to you like to give or get?

Thursday, March 24, 2011

Uses for the library

ALA (American Library Association for those outside the field) just announced it's Library of the Future award winner: Orange County Library System. That's Orange County Florida, thank you very much. Somewhat prophetically, the award was given because of the OCs plethora of technology classes offered each month. That made me think of why I go to my local library.

1. To check out craft books. If you haven't noticed, craft books can be quite expensive. I do not have the money to feed my crafting book addictions, so to the library I go. The last time I was there, I was actually a bit disappointed with the selection (I was looking for cross stitch books). I think I concluded that the reason that they didn't have any new cross stitch books is because the craft isn't as popular as it once was. They had plenty of new quilting books... which I also checked out. I like to dream about crafts I will never start.

2. To attend programs given by the Children's Department. Ironic, right, since I don't have any children. It's true, though, because whenever my sister comes to visit, we check out what's going on at the library. We get movies, find books to read, and go to the summer movie program the library offers. When my niece stayed with us last summer, we did the same thing. I even attended a story time with a former co-worker to get some ideas for the story time I used to lead (we called ahead first to make sure it was ok that two women with no children showed up). I strongly believe that allowing children to have fun times at the library will help assure the presence of libraries into the future. And yes, I also strongly believe that libraries will transition to find a place in the future. Doctor Who even says so:


3. To check out audio books. I have a long commute now. I wanted something to keep my mind busy while in the car. I was a bit disappointed to discover that our library does not actively purchase new audiobooks. I was forced to check out the Young Adult audiobook collection to find something I would enjoy.

Why do you go to your library? Or why don't you go to your library?

Friday, February 25, 2011

Crafting Notions and Office Supplies

Part of the curse of crafting and cataloging is a strong connection with notions and office supplies. With all of the crafts that I do, I often count down the days until Joann Fabric and Craft Stores has their half off notions wall sales. And who can catalog items without processing them and that requires all sorts of labels and tape and scissors and pencils... I love it.

So, some of you may be wondering what a "notion" actually is. You could head over to Wikipedia for a quick definition (I knew Wikipedia would be useful). Basically, a notion is anything that helps make your crafting job a little easier or more interesting. This can include things like buttons, threads, scissors, and snaps (although Joann has separate sales for the first three). And now for a list of a few of my favorite notions:
  • Dritz Super Seamer Ruler - This little gem is a life saver for hems and checking seams. And even after all the times I've accidentally ironed over the thing, it's never melted!
  • Gingher 4 inch featherweight thread snips - Gingher scissors are worth every penny, and these are fantastic. I keep them right next to my machine (unless I'm working on a cross stitch) so I'm ready whenever I need to snip some threads or small pieces of fabric.
  • Pattern weights - This link isn't to the specific weights that I have, but I really like Sewing with Nancy, so you can explore her site while you're there. I picked mine up in a thrift store; the workers didn't even know what a gem they had! I hate, hate, hate pinning patterns. These make cutting patterns so much more enjoyable. A quick Google search shows a bunch of different ideas for making your own.

On to office supplies... I recently won a $100 gift certificate to Gaylord, one of the library supply vendors in existence. First off, I would like to say how surprised I was that I even won. I stuck my business card in a bucket at a vendor show, and then I got the marvelous email. I never win anything! I was overwhelmed with the possibilities that the Gaylor catalog held for shopping. Should I be practical and buy paper? Should I be completely impractical and buy myself a small book cart? I think I got a little of both.
And my all time most favorite work tool? A bone folder. These wonderful little tools are great for pressing on labels and making a permanent crease in paper. This is also a great tool for crafting. You can use it when you're using a hot glue gun and irons to avoid burns.

If you had a $100 to spend, what notions and or office supplies would you buy?

Monday, January 24, 2011

Wrangling the Fabric Stash

Rumor has it that I have a lot of fabric. You judge:


Granted, it's not as much as some crafters/sewers, but I am still young. I’ve been motivated recently to organize said fabric. I’ve made several attempts over the years as my stash has grown. For example, I bought the lovely bins in which the aforementioned fabric now lives. Unfortunately, the only place for these bins is in the closet of our guest room (which is not a walk in like many fortunate crafters have) along with two bins filled with yarn (I like crafting), all of our holiday decorations, luggage, and who knows what else. The stack of five large bins invariably would create problems when I had an urge to craft because where would the item I wanted always be? In the bottom bin of course.

This dilemma motivated the purchase of these economical shelves (storage solutions can be pricey, and hey, I'm only working part-time these days):

The yarn stayed behind for this organizational stint. And yes, I have a problem collecting baskets, too.
And the purchase of the wonderful shelves motivated a complete overhaul of my fabric organization (or lack of organization actually). Here we are in the middle of the process:


I suppose we can reliably confirm the rumor that I do indeed have quite a bit of fabric.

As a cataloger, I spend my professional life organizing information and items into some sort of logical order, so I took the task of organizing my fabric quite seriously. Here are some questions I asked myself before I began:
  1. Why in the world do you have so much fabric? 
  2. No, seriously, why in the world do you keep buying this stuff? (that second question may have been motivated from my husbands exclamation when he came downstairs and saw the living room)
Then I started again:
  1. How do I use my fabric? 
  2. What sorts of projects do I like to do?
  3. Should I group by color?
  4. Should I group by type of fabric?
  5. Should I separate the large cuts of fabric that I bought to make actual patterns?
I decided on a couple of things.
  • Most of the crafting that I do is small projects that involve matching several different colors
  • I'm a wannabe quilter
  • I have a lot of fabric in our small home (have I already said that?)
  • I do a bunch of Christmas crafting
  • I may never make some of the patterns that I purchased when they went on sale for $.99
So here’s the organizational scheme that I developed:
  • Christmas fabrics
  • Colors: Red, pink, purple, orange/brown, yellow, green, blue, black, white/tan, flowers/prints (when repacking the boxes, the colors got mixed together by combined volume more than aesthetic reasons)
  • Fabric scraps for that day when I'll make a scrap quilt
  • Batting and interfacing will be housed separately (it's so bulky!)
All the fabric back in its newly labeled homes


Before putting the fabric back in the boxes, I took some time to refold things. I didn't go to quite these lengths, but I tried to make all my odd shaped fabric pieces a similar size so they fit in the boxes well. I also think it's a good idea to refold fabric on a semi-regular basis so the folds don't become "permanent" and no one part of the fabric fades more than others.

I really enjoyed going through all my fabric. It was like reuniting with old friends. I remembered clothes my mom made when I was little (she keeps giving me parts of her stash), gifts I have given to friends, projects I’ve enjoyed making, and dreams of projects unrealized.

And back in the closet again waiting for the next sewing project
 It's not as beautiful as some fabric stashes (my little sister painted the inside of the closet for us), but it's my fabric stash. And to me, it's gorgeous.

Thursday, January 20, 2011

Welcome to (yet another) blog

Blogs seem to be a dime a dozen these days. I've even tried my hand at one in the past without much success. I’ve recently changed jobs, though, moving from a full-time, stressful position to part-time librarian bliss. My official work days (all 2 ½ of them) are filled with complex original cataloging (my favorite!) and my off days (all 4 ½ of them!) are filled with… yet to be determined. I’ve always thought about blogging about cataloging, but I didn’t feel like talking much about my last job when the end of the day came. Besides, I didn’t think I could fill a whole blog with just topics about cataloging. The recent overabundance of free-time has prompted me to reacquaint myself with my love of crafting. So perhaps a blog combining two loves will be the ticket: cataloging (and maybe some general library stuff) and crafting (of all sorts). So, I would like to introduce you to The Crafty Cataloger, a potpourri of posts about the things I love. I hope you’ll join me on this journey as I discover what it means to be a part-time professional cataloger with a whole lot of time to fill.

The first project I tasked myself to complete was organizing all my fabric. Until then, take a look at my crafty corner. What crafting cataloger could live without a personal card catalog to organize all those crafting notions?